
Introduction

Preserving a bird skeleton is a meticulous process that involves cleaning, degreasing, and drying the bones to create a durable and visually appealing specimen. This comprehensive guide outlines the steps involved and highlights the benefits of undertaking such a preservation project.
Definition of “Preserving a Skeleton”
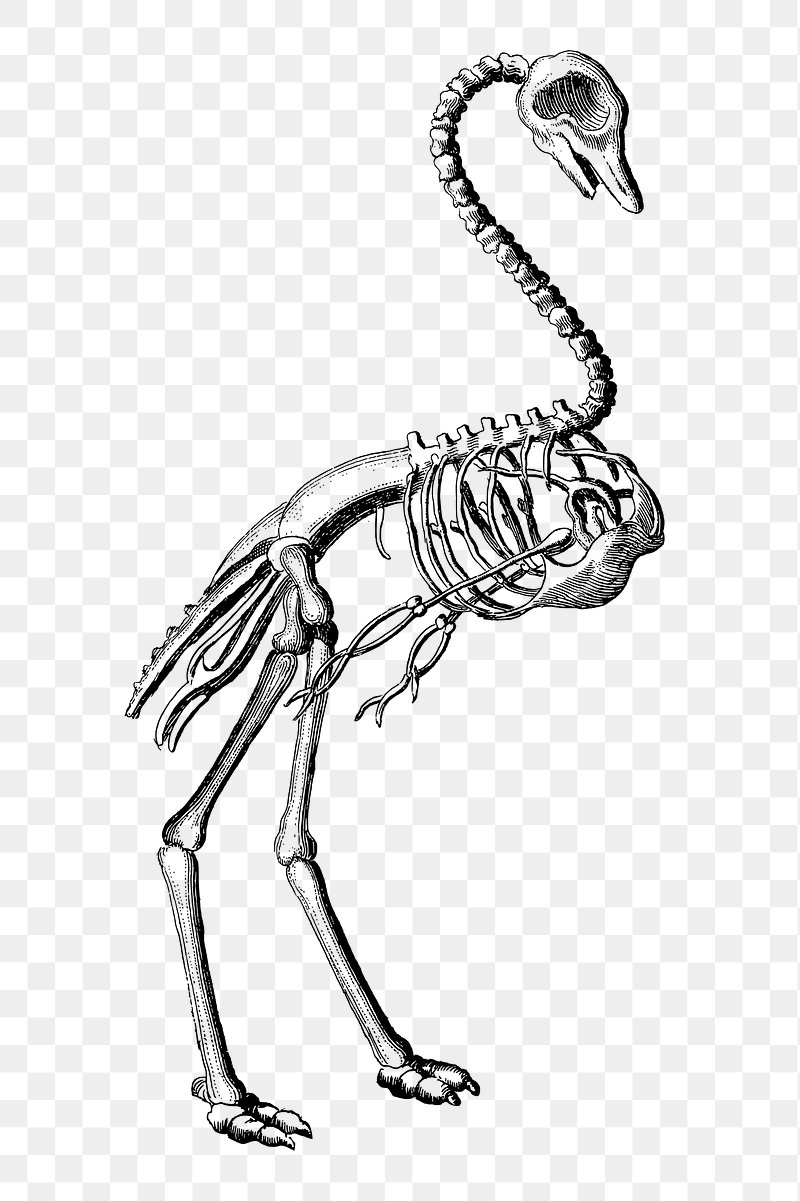
Preserving a skeleton refers to the careful cleaning, degreasing, and drying of the bones of a deceased bird. The process aims to eliminate any remaining organic matter from the bones and treat them to prevent decay. Through preservation, the bird skeleton can be transformed into a lasting artifact suitable for scientific study, education, art, or personal interest.
Overview of the Steps Involved
Preserving a bird skeleton involves key steps that ensure successful transformation:
-
Obtaining the Bird: Acquire a deceased bird through natural findings or legally obtained specimens, following local laws and regulations.
-
Preparing the Bird: Remove feathers, skin, muscles, and organs using manual techniques or chemical methods while wearing appropriate safety equipment.
-
Constructing a Support System: Use suitable materials to create a support system that ensures stability and proper alignment of the bones.
-
Drying the Skeleton: Air-dry the cleaned bones or use desiccation methods like silica gel to prevent decay and maintain integrity.
-
Preparing the Skeleton for Display: Mount the bird skeleton in a display case, securing it to prevent movement or damage, and create an aesthetically pleasing presentation.
Benefits of Preserving a Bird Skeleton
Preserving a bird skeleton offers numerous benefits:
-
Scientific Study: Detailed examination of the anatomy, structure, and adaptations of avian species for scientific research.
-
Education: Engaging teaching aids for studying avian anatomy and learning about bird species in educational institutions, museums, and nature centers.
-
Artistic and Decorative Displays: Intriguing aesthetic appeal for artistic projects or unique decorative pieces.
-
Personal Interest and Curiosity: Rewarding hobby for individuals fascinated by natural history, providing a deeper understanding and appreciation of avian anatomy.
By preserving a bird skeleton, you contribute to scientific knowledge, educate others, and satisfy your curiosity while creating a striking piece of natural art.
Preparing the Bird

Methods for Obtaining a Bird Skeleton
There are several methods to obtain a bird skeleton for preservation:
Natural Death
Collect the skeleton of a bird that has died of natural causes in the wild, ensuring compliance with local regulations.
Roadkill
Handle roadkill safely, wearing gloves and taking precautions to avoid health risks, to obtain a bird skeleton.
Hunting or Taxidermy Suppliers
Inquire about the availability of bird carcasses or skeletons from bird enthusiasts, taxidermists, local hunting clubs, taxidermy shops, or online communities, ensuring compliance with legal requirements.
Cleaning the Skeleton and Removing Any Remaining Flesh
To prepare the bird skeleton, remove remaining flesh using these steps:
Degreasing
Remove feathers, skin, and muscle tissue through careful dissection, using dermestid beetles, or employing maceration.
Dermestid Beetles: Place the bird carcass with beetles in a ventilated container, allowing them to consume the flesh and leave a clean skeleton.
Maceration: Submerge the bird carcass in water, changing it regularly to decompose the flesh and facilitate its removal.
Manual Cleaning
Use small tools like tweezers, toothbrushes, or soft brushes to meticulously remove any remaining flesh or tissue, taking care not to damage the bones.
Disinfecting the Skeleton

Disinfect the bird skeleton to prevent bacterial growth or pest infestation:
- Prepare a 1:1 solution of hydrogen peroxide and water.
- Submerge the cleaned bones in the solution for a few hours to whiten and sterilize them.
- Rinse the bones thoroughly with clean water to remove residual hydrogen peroxide.
- Air-dry the skeleton completely before proceeding.
Handle hydrogen peroxide with care, wearing gloves and working in a well-ventilated area.
Following these steps will result in a clean and disinfected bird skeleton ready for the next stage of preservation.
Constructing a Support System for the Skeleton

When constructing a support system for preserving a bird skeleton, it’s crucial to choose sturdy and lightweight materials. Consider the following options:
-
Wire: Opt for stainless steel or aluminum wire that can bear the weight without bending or breaking. This material allows for flexibility in shaping the support system to mimic the bird’s natural posture.
-
Dowels: Select hardwood dowels that strike a balance between stability and avoiding overpowering the delicate bird skeleton. Choose an appropriate thickness for adequate support.
-
PVC pipes: Look for PVC pipes with a suitable diameter to support the weight. This material allows for easy manipulation during construction.
To construct the support system:
-
Assess the size and shape: Examine the bird’s skeleton to determine the best approach.
-
Prepare the material: Cut the selected material into required lengths using pliers, wire cutters, or a saw. Ensure the lengths are appropriate for the bird’s size.
-
Wire construction: Bend and shape the wire to mimic the bird’s posture. Reference images or avian anatomy resources for accuracy.
-
Dowel or PVC construction: Assemble dowels or PVC pipes into a structure that provides stability and mimics the bird’s stance. Use connectors like elbow joints or T-connectors for PVC pipes. Secure dowels with wood glue or screws.
To secure the skeleton to the support system:
-
Positioning: Carefully position the skeleton on the support system, aligning it with the constructed framework in a natural and anatomically accurate posture.
-
Attachment: Use small wires or strings to fasten the skeleton discreetly, avoiding fragile areas. This stabilizes the skeleton and prevents movement.
-
Adjustments: Make necessary adjustments to ensure the support system adequately supports the skeleton’s weight and maintains stability.
By following these steps, you can construct a support system that provides stability and mimics the bird skeleton’s natural posture, allowing for proper preservation and display.
Drying the Skeleton

Drying the skeleton is crucial to prevent decay and ensure long-term stability. There are two desiccation methods available:
Natural Desiccation
Allow natural air circulation to gradually remove moisture from the bones:
- Place the bird carcass in a well-ventilated area with low humidity, ensuring protection from direct sunlight and scavengers.
- Monitor the skeleton regularly for decay or insect activity.
- Note that natural desiccation can be time-consuming, especially for larger bird species.
Chemical Desiccants

For faster drying:
- Use silica gel, a highly effective desiccant.
- Place the bird carcass in an airtight container with silica gel at the bottom, avoiding direct contact.
- Seal the container tightly and periodically check drying progress, replacing saturated silica gel.
Once the skeleton is dry, proper storage is essential:
- Select a low-humidity storage area, preferably climate-controlled.
- Choose a suitable container that provides space without deforming the bones, using sturdy materials like plastic or glass.
- Add moisture-absorbing agents like silica gel packets to prevent decay or fungal growth.
- Regularly inspect the container and skeleton for damage or deterioration.
By following these drying and storage guidelines, you can effectively preserve the bird skeleton for future display or study.
In the next sections, we will explore the process of preparing the skeleton for display, including mounting it in a display case, securing it in place, and adding finishing touches for an impressive presentation.
Word Count: 291 words
Preparing the Skeleton for Display

Once you have successfully preserved and dried the bird skeleton, it’s time to create an engaging and visually appealing display. This section will guide you through mounting the skeleton in a display case, securing it in place, and adding captivating finishing touches.
Mounting the Skeleton in a Display Case
Choose a durable and transparent display case that showcases the bird skeleton effectively. Look for materials like glass or acrylic that provide easy viewing. Ensure the case is spacious enough to accommodate the skeleton without crowding or damage.
Position the skeleton in a natural and aesthetically pleasing stance. Arrange the bones to reflect the bird’s posture, and consider using wires or fishing line to create a dynamic display. Experiment with different positions until you achieve the desired effect.
Securing the Skeleton in Place
Stability is essential for the skeleton within the display case. Use non-invasive methods to secure the bones, such as museum putty or adhesive clay. These materials offer temporary adhesion while allowing for easy removal or repositioning if needed. Avoid damaging adhesives or visible residue.
Finishing Touches for the Display
Enhance the visual impact of the display by incorporating natural elements that complement the bird’s habitat, such as branches or rocks. Research the bird’s behavior and include props or accessories that reflect its unique characteristics. However, keep the focus on the skeleton to highlight its intricate structure.
Add labels or signage to provide educational value. Offer information about the bird’s species, habitat, or notable features. Ensure the labels are clear and legible, enhancing the educational aspect without detracting from the main attraction—the bird skeleton.
Throughout the entire display process, prioritize the preservation and integrity of the bird’s skeleton. Handle the bones with care and avoid actions that could damage or degrade them. By following these guidelines, you can create a visually engaging display that showcases the beauty and complexity of the bird’s skeletal structure.
Conclusion

Preserving a bird skeleton involves several key steps that ensure its long-term preservation and display. By following the outlined process, enthusiasts, educators, and researchers can benefit from the educational, scientific, and artistic value that preserved bird skeletons offer.
Summary of the Steps Involved in Preserving a Bird Skeleton

The preservation process begins with obtaining a deceased bird specimen legally and ethically. Carefully remove feathers, tissue, and organs while avoiding bone damage. Clean and arrange the bones in their natural positions, allowing them to air dry completely. Optional steps like bone whitening can be taken cautiously. Finally, store the dried and clean bones in a cool, dry place or display them in a protected case.
Benefits of Preserving a Bird Skeleton
Preserved bird skeletons serve a range of purposes and offer numerous benefits:
-
Educational Purposes: They provide valuable tools for studying avian anatomy and species diversity, benefiting students and researchers alike.
-
Scientific Research: Preserved bird skeletons contribute to the understanding of avian biology, evolutionary patterns, and adaptations, supporting various research fields.
-
Artistic and Decorative Value: Bird skeletons possess a unique aesthetic beauty, appealing to artists and individuals with an appreciation for natural history.
-
Conservation and Documentation: Preserving bird skeletons aids in documenting avian biodiversity and contributes to conservation efforts.
Resources for Further Information
For additional information on preserving bird skeletons, consult the following resources:
- Museum collections and natural history institutions
- Scientific articles and research papers
- Online forums and communities dedicated to bird preservation and taxidermy
Preserving a bird skeleton not only contributes to our knowledge of avian biology but also enables us to appreciate the intricate beauty and diversity of these creatures. Whether for educational, scientific, or artistic purposes, the preservation of bird skeletons offers a fascinating journey into the world of avian anatomy and evolution.
Frequently Asked Questions

FAQ: How to Preserve the Skeleton of a Dead Bird
1. How long does it take to preserve a bird skeleton naturally?
The time it takes to preserve a bird skeleton naturally through air-drying can vary depending on factors such as the size of the bird and environmental conditions. Generally, it can take several weeks to several months for the bones to completely dry and be ready for display or storage.
2. Can I use other methods besides air-drying to preserve a bird skeleton?

Yes, besides natural desiccation, you can use chemical desiccants like silica gel to speed up the drying process. Silica gel absorbs moisture from the bones, helping to prevent decay. Place the bird carcass in an airtight container with silica gel, periodically checking its progress and replacing saturated gel.
3. Are there any legal restrictions on obtaining bird carcasses for preservation?
Yes, there may be legal restrictions on obtaining bird carcasses, especially for protected or endangered species. It’s important to familiarize yourself with local laws and regulations regarding the collection and possession of bird specimens. Obtain birds through legal means such as natural findings, roadkill, or from licensed taxidermy suppliers.
4. How do I clean the skeleton without damaging the bones?
To clean the skeleton without damaging the bones, you can use manual cleaning methods. Use small tools like tweezers, toothbrushes, or soft brushes to carefully remove any remaining flesh or tissue. Take your time and work gently to avoid causing damage to the bones. Additionally, consider using dermestid beetles or maceration to remove flesh from the bones.
5. How can I ensure the long-term preservation of the bird skeleton?
To ensure the long-term preservation of the bird skeleton, it’s important to store it in a cool, dry place with low humidity. Choose a suitable container made of sturdy materials like plastic or glass that provides enough space without deforming the bones. Adding
Leave a Reply